

Managing products
Adding a product
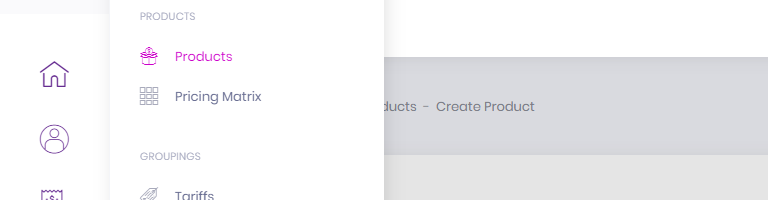
Start by clicking the Products menu-item in the left-hand navigation and then clicking the Products sub-menu link.
This brings us to the Products listings screen, click the Create Product button at the top-right of the screen.
This will take you to the Create New Product wizard.
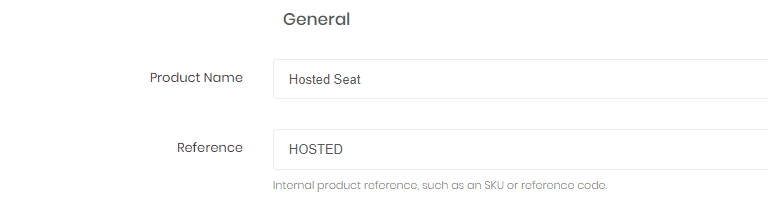
Step 1 - Details
| Field | Description |
|---|---|
| Name | The name of your product or service, this will be what appears on the customer invoice. |
| Reference (Optional) | This is a unique reference you’d use internally such as a Stock Keeping Unit (SKU). |
| Category | The category you would like to group this product or service under. When you first create an account you have a base set of categories: Cloud, Data, Mobile and Voice. Clicking on the Create one link below the Category field will take you to the Category screen where you’re able to manage your categories. |
| Supplier | This field allows you to designate the supplier of the product, which can be utilised to filter product lists and is also used for a range of analytics. As with Category, clicking on the Create one link below the Supplier field will take you to the Supplier screen where you’re able to manage your suppliers. |
Step 2 - Charge Type
| Field | Description |
|---|---|
| Type | Choose between whether the charge only occurs once or if it’s a recurring charge that occurs at a regular interval. |
| Frequency (if Type is Recurring) | This is how often the product charge should be applied. |
Stage 3 - Pricing
| Field | Description |
|---|---|
| Sell Price | A baseline price to sell this product to your customers at, this can be expanded upon later. |
| Sell Price is inclusive of Tax | Check this option if the value you've entered into Sell Price already includes tax. Billingbooth will then factor this in when calculating invoices. |
| Buy Price (Optional) | The cost to you to provider this product or service. |
With all the fields filled out, you now have the option of clicking Create Product or Create Product & Edit.
The Create Product button will create the product as is and return you to the Product listings screen.
The Create Product & Edit button will also create the product, but will then take you to that newly created product’s edit screen where you now have the ability to enter additional information to flesh out the product.
Additional information
If you amend a product you have created, you will see that the information for the product is now split between three tabs: General, Pricing and Accountancy.
Most of the fields you used to create the product are under the General tab.
Pricing
The Pricing tab features your base pricing which you added during product creation now with two additional fields detailed below.
| Field | Description |
|---|---|
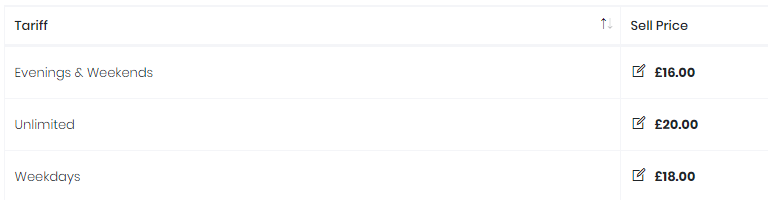
| Tariff Pricing (Optional) | This field allows you to define tariff-specific pricing for the tariffs you have created for your product’s category. For example, if your product has a Category of Data, then you would be able to set pricing for customers on Data tariffs you have created. If no such tariffs exist, Billingbooth will inform you and give you the means to manage your tariffs which you can otherwise reach by heading to Products > Tariffs. To add a new tariff price for this product, click the Add Price button under Tariff Pricing. A modal window will pop-up allowing you to select a Tariff and then the Price a customer on that particular tariff would pay for this product. Once you’re happy, click the Add Price button on the modal window to add the tariff price to the product. You’re able to add as many tariff prices as you need. |
| Customer Pricing (Optional) | This field allows you to define customer-specific pricing for this product. For example, if Customer A has a bespoke price you charge them for this particular product. Customer Pricing takes precedence over Tariff Pricing, so even if the customer(s) you select here is on a tariff you have specific pricing for, the customer-specific price will be what Billingbooth uses. To add a new customer price for this product, click the Add Price button under Customer Pricing. A modal window will pop-up allowing you to select a Customer and then the Price that customer would pay for this product. Once you’re happy, click the Add Price button on the modal window to add the customer price to the product. You’re able to add as many customer prices as you need. |
Accountancy
The Accountancy tab simply lets you enter the details of a nominal account.
| Field | Description |
|---|---|
| Nominal Account (Optional) | This field is where you can enter the nominal account your third-party accountancy packages such as Sage, Xero etc. would use. |
Once you’re done with your changes, simply click the Save Changes button to commit the amendments you’ve made.
Overview of Tariffs
What is a tariff in Billingbooth One?
In Billingbooth One, a tariff is a term for a band of pricing for a given Category. If your company has differing price bands for products or services, tariffs offer a simple means of assigning them to your customers.
For example, you may have categories called: Voice, Mobile and Data.
For your Voice category, maybe you have categories that revolve around when your customers make the most calls, such as Weekdays, Evenings & Weekends and Unlimited.
For your Data category, that may have pricing depending on the length of a contract, so you might have tariffs called 12 Month, 24 Month and 36 Month.
For Mobile, perhaps you have plans with unique names your customers can be placed on, such as Turtle, Hare or Cheetah.
At their core, Tariffs give you flexibility with your pricing without having to drill down to a strictly customer-specific structure.
How tariffs work in Billingbooth One
When you create or edit a customer within Billingbooth One, you are optionally able to assign them to a tariff per category.
Using the examples above, when we create a new customer we could assign them to our Evenings & Weekends tariff on our Voice category, our 24 Month tariff on our Data category and our Cheetah tariff on our Mobile category.
That way, if we're assigning a charge to this customer that falls into the Data category and it has pricing specific to the Evenings & Weekends tariff, Billingbooth will use that pricing for the customer, unless customer-specific pricing or another form of override exists.
If no specific pricing was to apply to a given tariff, Billingbooth would fall back to a base rate for the given charge which you're able to set when creating the product or charge.
Different ways of adjusting tariff pricing in Billingbooth One
In order to adjust tariff prices you've set within Billingbooth, you have a couple of options.
Firstly, if you wish to adjust the tariff pricing of a specific product, you can click the Products menu item in the side-navigation followed by the Products sub-menu item. Then, click the respective Edit button of the product listing you wish to adjust the tariff pricing of.
Once on the Amend Product screen, click the Pricing tab at the top-right. From this screen you can adjust the base rates for buying and selling the product and also adjust or create new pricing for tariffs.
If you wish to adjust tariff prices across the board, your best bet would be to utilise the Pricing Matrix.
Using the Pricing Matrix
The Product Matrix allows you to quickly and easily amend Product pricing across the Suppliers, Categories and Tariffs you have already set up.
Let's look at the example Pricing Matrix above, for our "Voice" category.
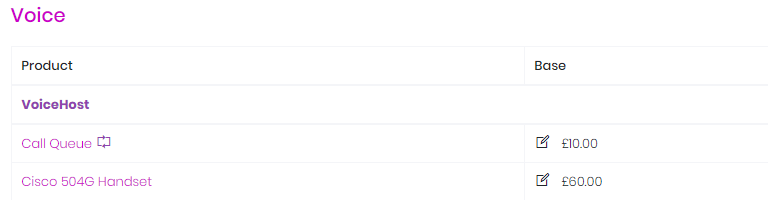
Our first product in the list is Call Queue, the product name has a little symbol next to it, denoting that this product is a recurring charge. We can then see the sell prices for this product depending on if an assigned customer is on the Base tariff, our custom Evening & Weekends, Weekdays or Unlimited tariffs. Each price also has a symbol next to it, denoting you can edit the field by clicking into it.
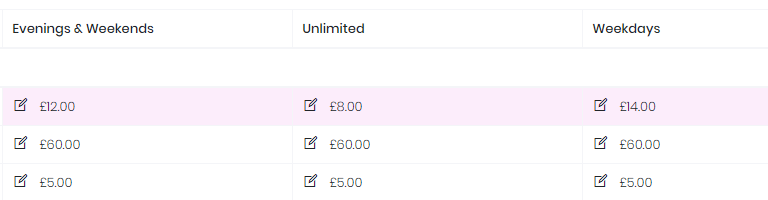
By clicking into one of the price cells, a small modal window pops up, allowing you to apply a new sell price. Simply enter your desired value and click the Apply Price button to submit the change or click the Cancel button to return to the Pricing Matrix without amending the value.
The second product listing is specific to one of the suppliers on our demo account and is for Cisco 504G Handset, which is a singular charge and so doesn't have a symbol beside it. Unlike the previous listing, however, this product doesn't have different pricing based on tariff, so no matter if a customer is on the Base tariff, our custom Retail tariff or our custom Wholesale tariff, the Base tariff sell price is what will be used. If you wish to enter a specific sell price for one of your custom tariffs, click the applicable cell and amend the price via the modal window that pops up. Once done, you'll see that the cell you amended now has a coloured background, indicating it is tariff specific.